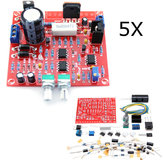
US$9.19
- Wszystkie recenzje(1363)
- Obrazy
- Wideo(8)
Sortuj według:
Recenzje tylko z Twojego kraju (Poland)
|
Pokaż oryginał
Część recenzji została przetłumaczona automatycznie.
-
 FilHypeVIP3FR09/11/2016
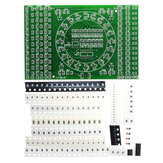
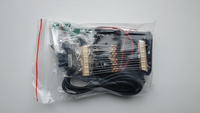
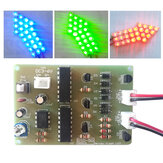
Package is full, but the instruction document is not the good one for the colorful led version. I upload a picture with the correct resistor value !
Komentarze (3)Pokaż oryginał -
ffejr22VIP3US11/11/2017
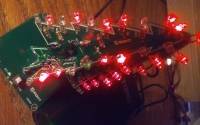
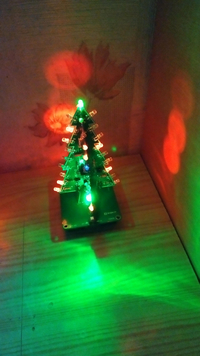
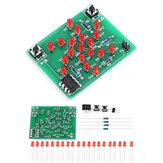
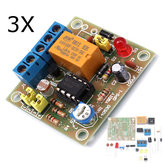
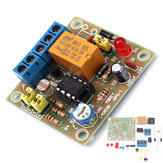
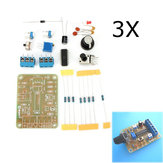
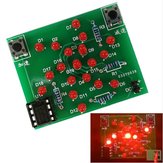
All components included easy to solder, good for beginners bcps are labeled for most components 10k (r1,r3,r5 = brn,blk,org,gold) resistors, transistors, capacitors, switch and power connectors are clearly marked 2.2k (red,red,red,gold) goes in r7 on pcb 'A' all others resistors are the 1k (r2, r4, r6 = brn,blk,red,gold) the r7 2.2k resistor runs the top led my kit included one extra led, and had one bad led tree stands 5.5x2.5x2.5 when completed very low power draw, 0.05a
Komentarze (2)Pokaż oryginał -
BjoernVIP1DK15/11/2015
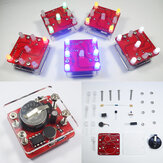
Fine kit. Everything was in the package (I even got one extra LED) Instructions are fine, but the delivered resistors does not match the instructions. Just follow the instructions, and use correct resistors (see below)) The correct resistors: R1, R3, R5, R7: 10 kOhm (Note: R7 is only on board CTR-30A) R2: 2,2 kOhm R4: 1 KOhm R6: 33 Ohm (39 Ohm works fine) Have fun.
Komentarze (1)Pokaż oryginał -
AerotecGB13/12/2016
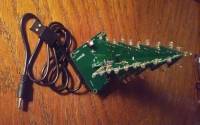
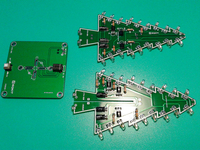
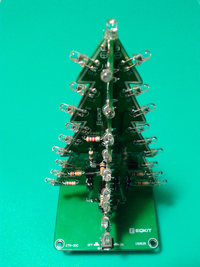
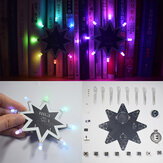
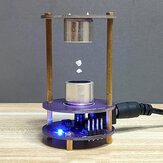
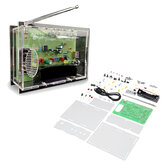
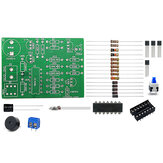
Having no experience of electrical circuits I was unsure what to do when this arrived. The download instructions aren't that clear so here are my tips for assembling the multi colour LED version with white LEDs: View a PDF with assembly details here (Credit to the reviewer pages back who posted this): http://www.haoyuelectronics.com/Attachment/CTR-30C/CTR-30C%20Flashing%20Christmas%20Tree%20Instruction.pdf Link with images is: http://www.haoyuelectronics.com/Attachment/CTR-30C/ CTR-30A is one tree PCB CTR-30B is the other one CTR-30C is the base Resistors: These can be fitted in either direction and are: 6 x 1k: Colour bands Gold/Red/Black/Brown 6 x 10k: Colour Bands Gold/Orange/Black/Brown 1 x 2.2k: Colour Band Gold/Red/Red/Red Locate where these go via the pdf and insert in to the relevant location R1, R2 etc... The single 2.2k goes on R7 on CTR-30A. Transistor (With the 3 legs) Must be fitted the right way but the PCB shows the orientation. All are the same spec so use any of them. Capacitor Must be fitted the right way. Longer leg is (+) Positive. And negative side is printed on the casing. All the same spec so fit where required. LEDs Must be fitted the right way. Longer leg is (+). Positive terminal is the lower location where the letter is such as D1, D2 etc. Solder in place with enough length to bend to point out the way. Solder the tree segments together. When you fit the soldered tree to the base I recommend installing and power up to test before soldering in as you can have a (+) against a (+) as per the instructions but it can still be 90 degrees out. I did this and it was a pain to unsolder as I didn't have a solder sucker. It all went together and worked great once I had realigned the tree to the base and works great off USB power.
KomentarzePokaż oryginał -
23/12/2020
To jest takie piękne i łatwe do zrobienia. Ale nie ma instrukcji napisanej na papierze, a pobrana instrukcja z linku nie jest poprawna.(nie było w niej kilku rezystorów) Więc jeśli zrobisz to, rezystory lutownicze w ten sposób : CZĘŚĆ A R1=10k R2=1k R3=10k R4=1k R5=10k R6=1k R7=2,2k CZĘŚĆ B R1=10K R2=1k R3=10k R4=1k R5=10k R6=1k
KomentarzePokaż oryginał -
21/12/2017
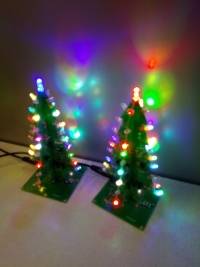
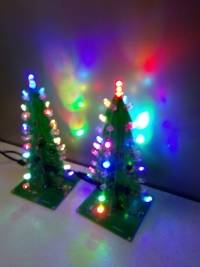
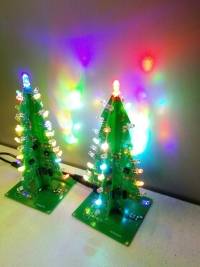
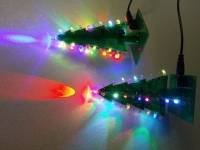
I have now purchased 5 of these kits. Lots of fun, once you figure out which resistors go where - See pictures. Youtube has some good videos on construction
Komentarze (2)Pokaż oryginał -
13/11/2017
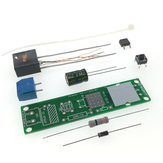
Vor kurzem habe ich den Bausatzsatz erhalten und, nachdem ich eine Bauteiliste entsprechend der gelieferten Bauteile im Internet gefunden habe, zusamen gebaut. Nach dem Zusammenbau und dem harten Test, habe ich ein paar Bilder gemacht. Ausserdem habe die Bauteilliste beigelegt. Viel Spass beim Löten.
Komentarze (2)Pokaż oryginał -
S4SpaVIP1RU01/01/2021
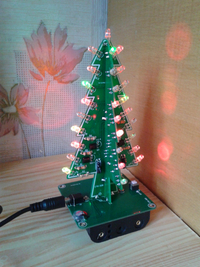
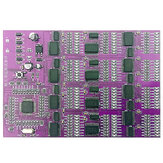
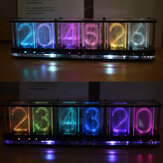
Ładny zestaw treningowy. Jakość płyt obwodowych drukowanych jest wysoka: tory są gładkie bez pęknięć, dziury są metalizowane. Jeśli idzie to łatwo, internet ma podręczniki i wideo. Zmontowany projekt zaczął działać od razu zarówno za pomocą kabla USB, jak i trzech baterii AA. Tak się składa, że mam zestaw, w którym każda dioda oświetla поочерёдно w trzech kolorach: czerwonym, zielonym i niebieskim. Są cztery otwory w podstawce, więc może w przyszłości zrobię ochronną walizkę dla tego drzewa. Należy również dodać, że ten projekt ma bardzo niskie zużycie prądu około 16 mA. Wspaniały prezent noworoczny. Polecam to.
KomentarzePokaż oryginał -
02/01/2018
I have purchase 16 units in total as Xmas gift and everybody LOVE it.
Komentarze (2)Pokaż oryginał -
sptginVIP2UA06/02/2019
Funny Christmas toy.
KomentarzePokaż oryginał


Show:
Możesz być zainteresowany
-
 US$7.59
 -
US$9.76
-
US$13.99
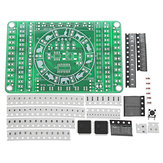
Zestaw do testowania lutowania SMT na płytce elektronicznej DC 9V
-
US$18.39
-
US$45.49
-
US$66.95
-
US$6.99
-
US$11.49
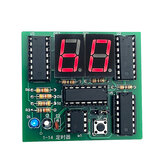
5-voltowe zestawy DIY dwubitowej płytki zegarowej DIY Electronic Kit
-
US$6.99
-
US$7.24
Elektroniczny zestaw do samodzielnego montażu ogników elektronicznych.
-
US$8.04
3szt. zestaw do ćwiczeń z lutownicą do samodzielnego montażu diod LED SMD
-
US$6.99
-
US$18.09
-
US$9.23
-
US$7.46
-
US$15.99
-
US$7.99
Moduł DIY regulowanego zasilacza prądu stałego 0-30V 2mA - 3A
-
US$13.79
-
US$8.99
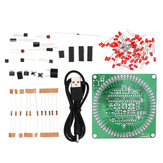
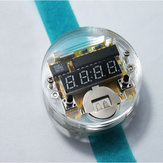
Zestaw do samodzielnego złożenia zegarka elektronicznego LED z przezroczystą obudową
-
US$6.99
-
US$11.99
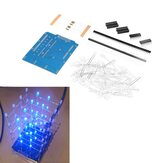
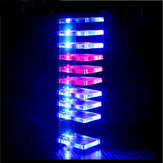
DIY marzenie Kryształowa kolumna świetlna kostka LED z muzyką głosową wzór zestawu
-
US$3.99
-
US$18.51
-
US$12.99
-
US$20.69
-
US$12.99
DIY 51 Jednoipolowy mikrokomputerowy zestaw do produkcji elektronicznej wagi
-
US$22.99
-
US$11.49
-
US$9.19
-
US$6.99
-
US$12.69
-
US$10.34
5V Elektroniczny zestaw prostego zamka z hasłem na płycie głównej
-
US$13.99
-
US$3.99
-
US$41.99
-
US$28.86
5 sztuk Oryginalny Hiland 0-30V 2mA - 3A Regulowany zasilacz prądu stałego DIY Kit
-
US$7.99
-
US$11.64
-
US$11.99
WangDaTao YD-CS Tester tranzystorów zestaw produkcyjny z obudową
-
US$4.99
-
US$20.84
-
US$7.99
-
US$32.99
-
US$41.99
-
US$15.00
3Pcs DC12 zestaw DIY generatora sygnałowego ICL8038 funkcji Sygnał sinusoidalny trójkątny kwadratowy
-
US$27.71
3 częściowy oryginalny Hiland 0-30V 2mA - 3A Regulowany moduł zasilacza prądu stałego DIY Kit
-
US$6.89
-
US$7.58
DIY Elektroniczny zestaw do alarmu antykradzieżowego dla motocykli
-
US$13.79
-
US$12.69


recommendation for you
-
US$8.99
-
US$33.34
-
US$12.99
-
US$6.99
-
US$86.61
-
US$8.73
-
US$3.49
-
US$29.99
-
US$8.73
-
US$6.89
-
US$12.99
-
US$23.99
-
US$22.07
-
US$19.99
-
US$6.89
-
US$35.99
-
US$14.26
-
US$12.69